Design placement & sizing on Knitwise templatesUpdated 5 months ago
To ensure your design's placement and size translate accurately from 2D templates to 3D knitted products, follow these 3 steps:
Step 1: Learn 3 design tips before you start
1. Understand the panel connections in the Knitwise template.
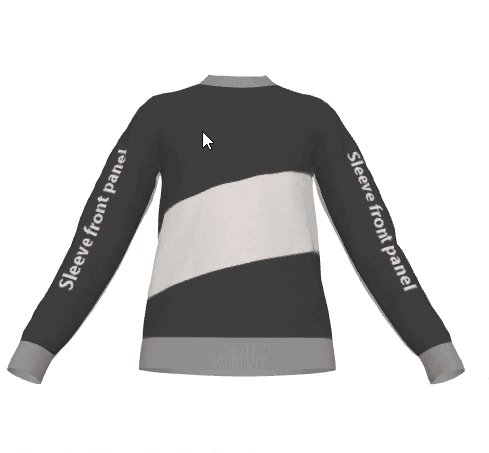
- For apparel like sweaters and vests, each 2D panel connects to the adjacent panels as shown in the illustration below.
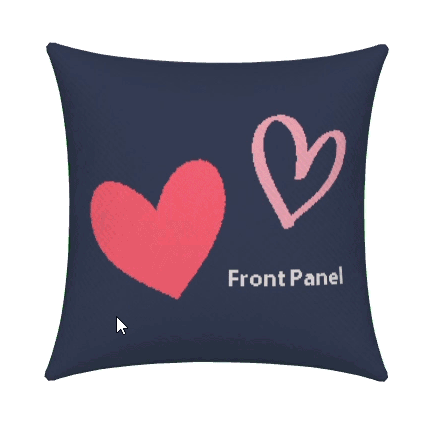
- For pillowcases, the 2D panel on the Knitwise template connects according to the illustration below.
2. Pattern alignment.
Once you understand how panels are connected, you can align the pattern or stripes on your design to make it look perfect on the final product.
In this case, we are going to use stripes as a pattern.
Align the stripes on the front panel with the sleeves panel.
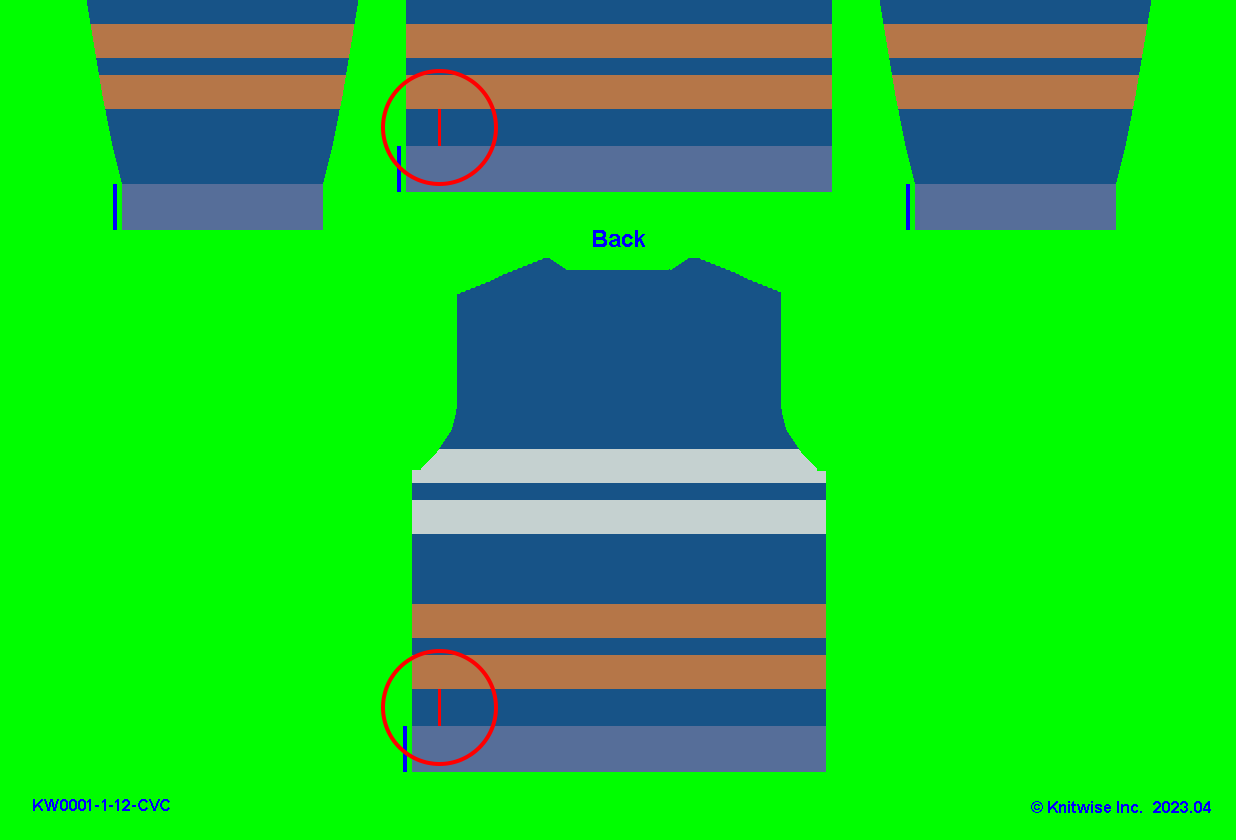
Align the stripes on the front panel with the stripes on the back panel.
This is the tricky part since these two panels are not placed next to each other on the template. So what you need to do is take the bottom trim as a distance reference. You can count the pixels or you can draw a guideline if that's easier for you.
Once you draw the guideline on the front, you can paste it in the back panel and place the pattern following the marked distance
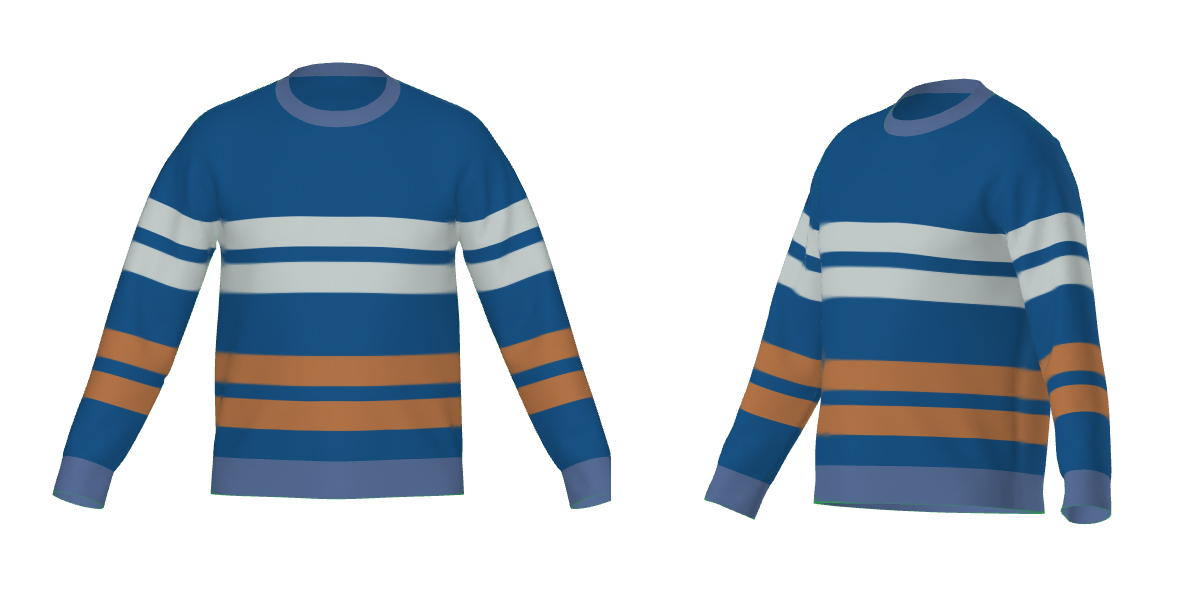
After completing the alignment and removing the guidelines, we always recommend to check how it looks on the 3D simulation. Now the stripes look perfectly connected to each other.
3. Keep body curvature in mind when designing apparel.
When designing apparel, keep in mind that graphics placed near panel edges can experience some visual distortion due to the body's shape. This effect is more noticeable on sleeves compared to the front and back panels. To maintain clarity, it's a good practice to position important designs away from the edges to avoid this issue.
Here's an illustrative example of how we recommend positioning artwork on the front panel to prevent potential distortion: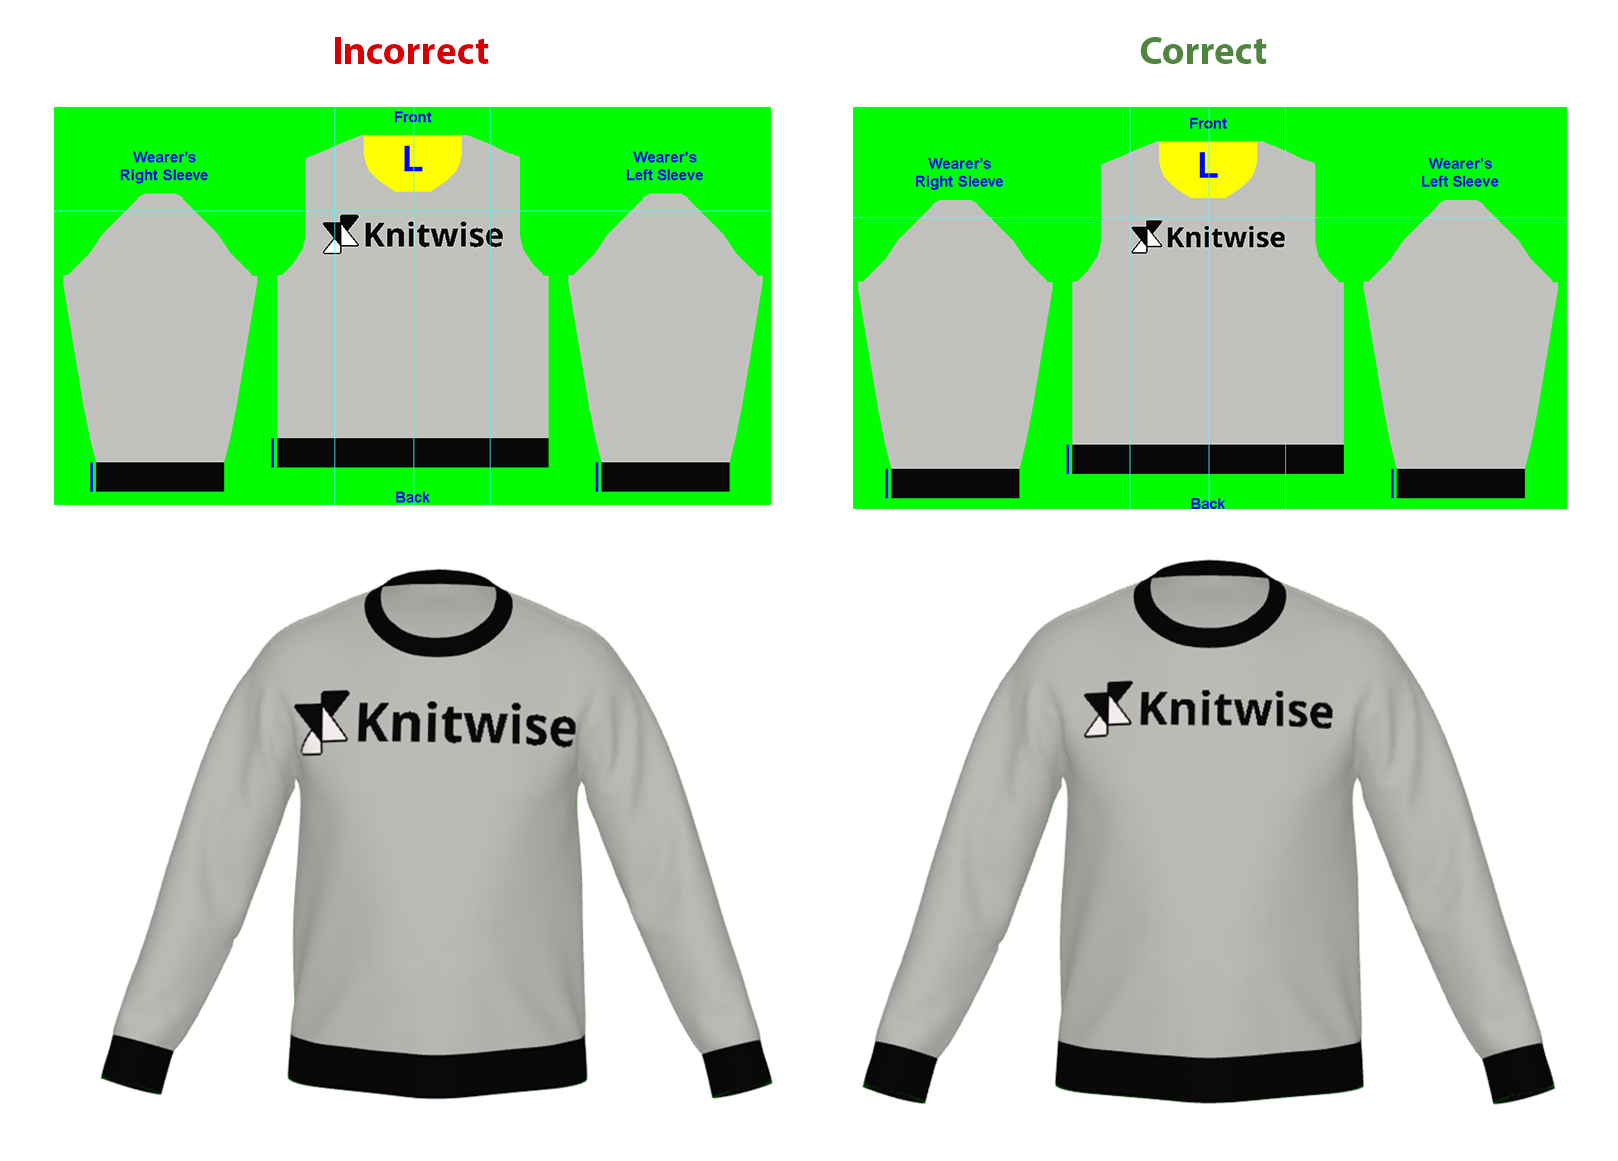
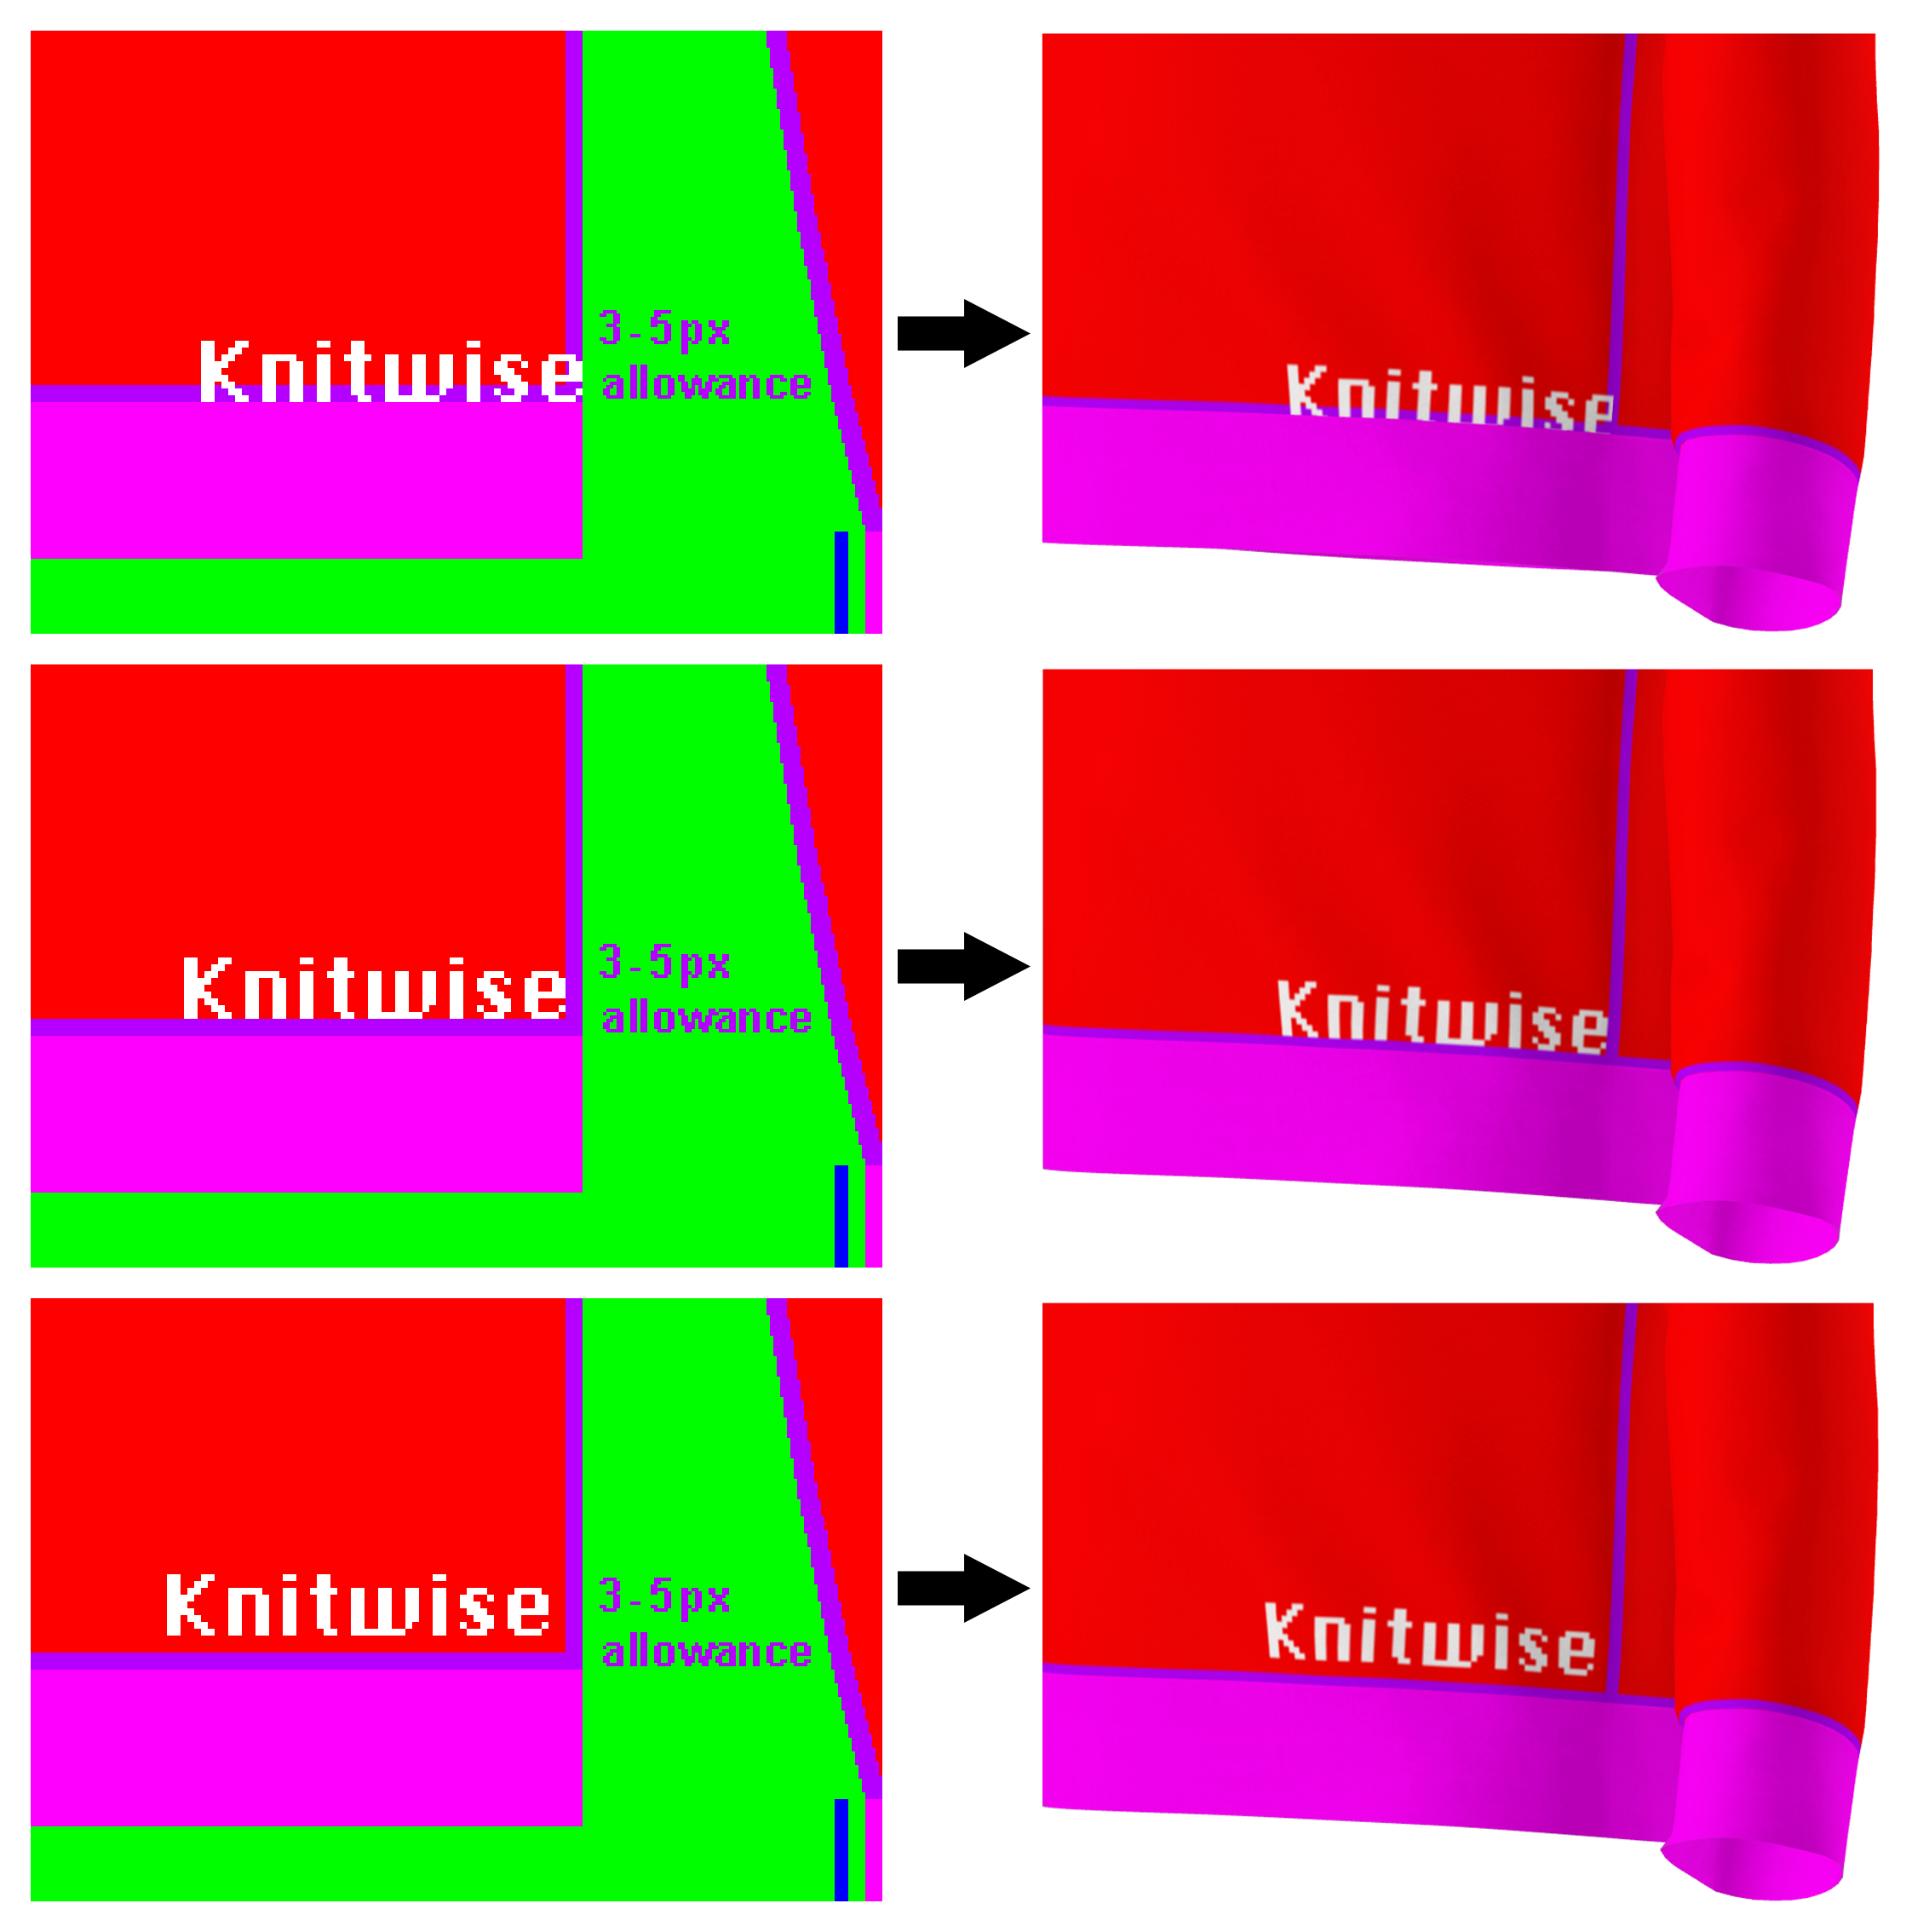
4. Manual Stitching Seam Allowance
Avoid placing design elements near the edges. A minimum of 3-5 pixel seam allowance is required for manual stitching. We recommend always checking your design with our 3D preview mockup for a more true-to-life view.
Step 2: Visualize Your Design in 3D
After finishing your design, use our 3D simulation feature in the Format Checker tool to view it in full 3D detail. For more help with this tool, check Step 4: Check Design Format for Manufacturing.